Add a Customer in RiskTitan Portal
How to add a customer, navigate to the Manage Customers menu in Quick Links
 Navigate to the Login screen for your RiskTitan portal. Sign in with your login credentials.
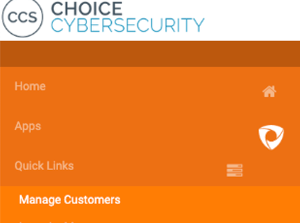
 Hover over the orange menu bar on the left side of the RiskTitan page
 Select Manage Customers
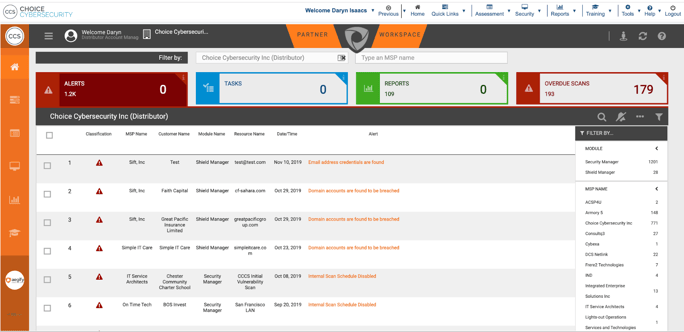
. The Manage Customers page will display a list of your
current customers.
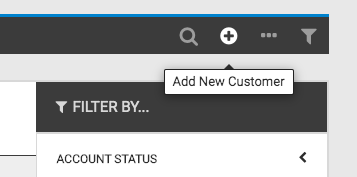
 Select
 the
“Add New Customer” button i the black menu bar above the customers list. It is located to the right of the search button and is a gray circle with a black + icon in the middle.
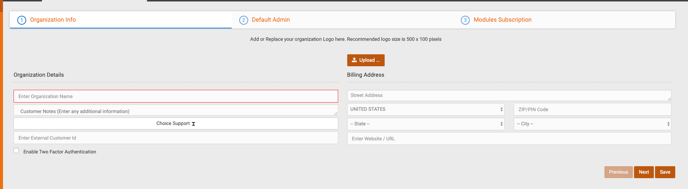
The new customer sign-up page will appear. Enter the new customer’s organization name
Enter any customer notes you have to be stored with the customer profile
Select your
partner users for the customer. These are the users from your company that will have access to the customer.

Enter an external customer ID if desired, this is for API integrations and optional.
Enter customer billing address
Click Next
- Select the title for the new customer.
- Enter customer first and last name.
-
Enter customer contact email and customer login email.
-
BEFORE PROCEEDING, PLEASE REFER TO THE FOLLOWING DEFINITIONS
-
Customer contact email will receive the email notifications from RiskTitan.
-
Login email is only used for logging into the RiskTitan portal.
-
Both emails can be the same, but do not have to be.

 Next, add modules based on the services provided to the customers. To do this, find the desired module in the “modules” column. Here, I want to add “Configuration and Policy Checks”. Click the plus icon next to the module to be added.
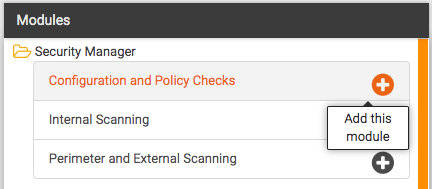
The module will appear in the “selected modules” column now.
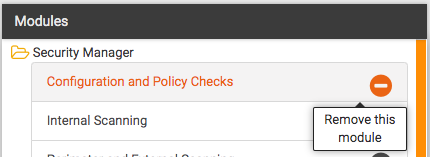
If you would like to remove a module, select the minus icon next to a module which you’ve already added.
The removed module will no longer appear in the “Selected Modules” column.
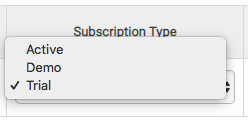
Open the “Subscription Type” menu to change the subscription type.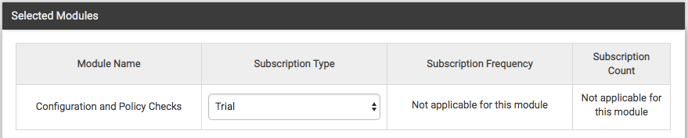
Once you have added all the services provided for the customer, select “Save”. The customer will now appear in your customers list.
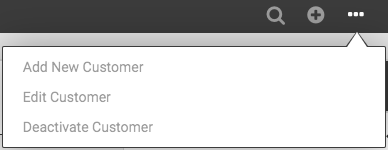
If you would like to edit the customer information, click the checkbox to the left of the name of the customer’s information you would like to edit.
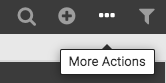
Once the customer’s checkbox is checked, select the “more actions” icon. The “more actions” icon is an image of three dots located to the right of the “add customer” icon.
From the “more actions” menu, you can select to edit a customer’s information. You can also deactivate a customer from this menu.